

我收到很多来信、反应都表示很喜欢这个小旅箱, 希望可以有个教程, 之前其实有拍了教程的了, 但是不懂被我放去哪里了, 所以这次趁还有再作就拍了下来.
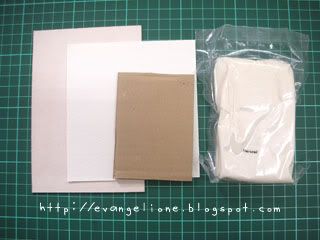

soft board, paper, carton, resin clay
硬卡, 纸(普通纸, 什么纸都行) 纸箱纸, 树脂粘土
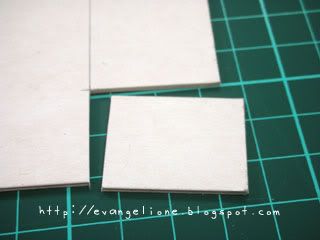

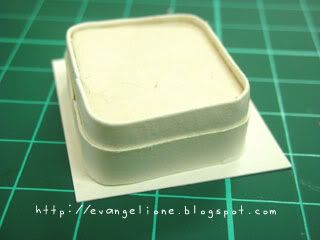
u can do any size u like, for this tutorial i do 2.5cm 3 cm
什么size都可以, 这个教程里的是2.5cm x 3 cm

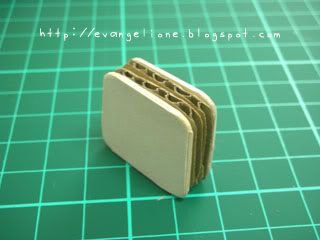
cut out two pieces like this
需要两片

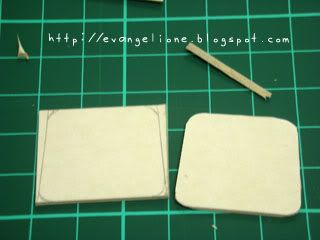
in the middle use the carton to fill up to support.
中间的部分要用纸皮箱纸垫着, 要用其他东西也可以。要多厚也随意

like this
像酱
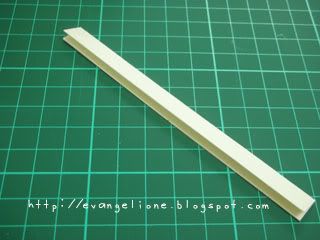

这个是很普通的纸, 像这样折。宽度要依照你的箱子的厚度而定。
very common paper, u can use any kind of paper, fold into thin line like this.the width has to according to the width of your luggage, just a bit wider.
very common paper, u can use any kind of paper, fold into thin line like this.the width has to according to the width of your luggage, just a bit wider.

绕着黏
glue it around ur luggage like this
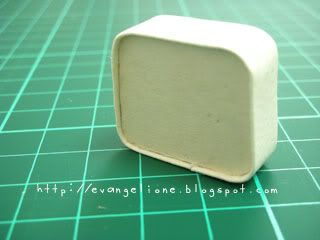

then u have the this
像酱

glue another paper around the front part ot the luggage
再黏一层

then u will get the look like this, we need to cover it up with another paper
前面会看得隙缝, 必须遮起来

like this, paste it to another paper
像酱, 黏在一张纸上。
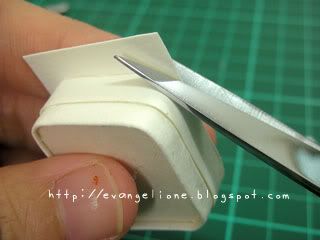

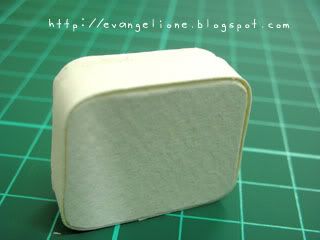
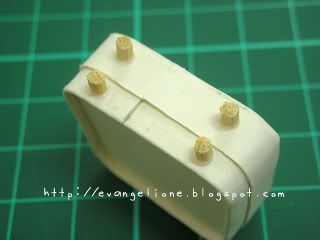
待干后剪掉多余的纸
cut out the excess


press a bit at the edge to make it look more smooth
刮一下旁边角的地方, 使其更平滑
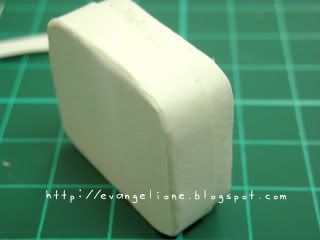

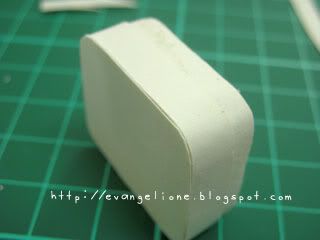
the outcome

this is tooth pick, cut it.
牙签, 切成这样

paste them to the bottom
黏在底部
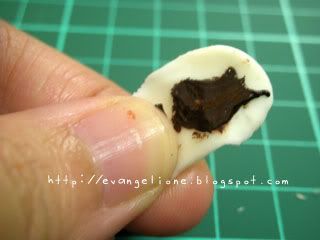

手柄就用树脂粘土捏, 混入要的颜色(好象大便涂面包)
for the handle i use resin clay , roll in the color u want into the clay first.
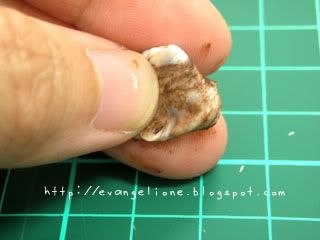
like this

like this
就像这样。
很多人问粘土要怎么混入颜色。。。就。。。这样混。。。

then shape
像酱。。
after done the handle just paste it to ur painted luggage
干后黏在箱子上就可以了。 箱子要先上色画过。 就完成了
啊~~~~这篇东西怪怪的~~~><我不知道我在写什么~~~><
大家将就看吧><
不知道为什么你的个人部落我留言不到~~~~
ReplyDelete所以copy来这里~~~
。。。。。。
好久没来了~~~
嗯嗯。。。
是不是太忙碌了呢?!?!
忙得让你透不过气来~~~
你是不是要出去走走喘下气了呢?!
无论如何~~~
时间不会为任何人而停留!
加油~~~
by: doris
真的不是开玩笑,把所有tutorial compile起来,以后可以出书。
ReplyDelete太可爱了吧~~
ReplyDelete有点冲动去买材料来玩玩~~
What a lovely tutorial! And Hi from Finland :)
ReplyDeletedoris,
ReplyDelete谢谢! ^_^
mclulu,
嗯啦, 我知道.
ciyou,
冲去买吧! XD
Maria,
>O< hi hi~ wat a surprise to see u here^^
nice and simple, i thought those mini luggage need complecated works. anyway, tihngs that look simple is hard to make. very nice and cute
ReplyDeleteThat's very generous and honorable for you to share your skills. It's too bad most crafter "copies" and not give thoughts to making "their own creation". However with that said, no one could probably make it the way you make yours. and after all, they could copy this idea, but how many new products can they come up with, without you. :) Thanks for sharing @;-`--
ReplyDeletei've been searching this tutorial for a long time. thanks for sharing. :)
ReplyDeleteI wanted to thank you for this excellent read!! I definitely loved every little bit of it. I have you bookmarked your site to check out the new stuff you post. scratch off world map
ReplyDelete